Saturday, January 19, 2019
Double Weave Window Panes
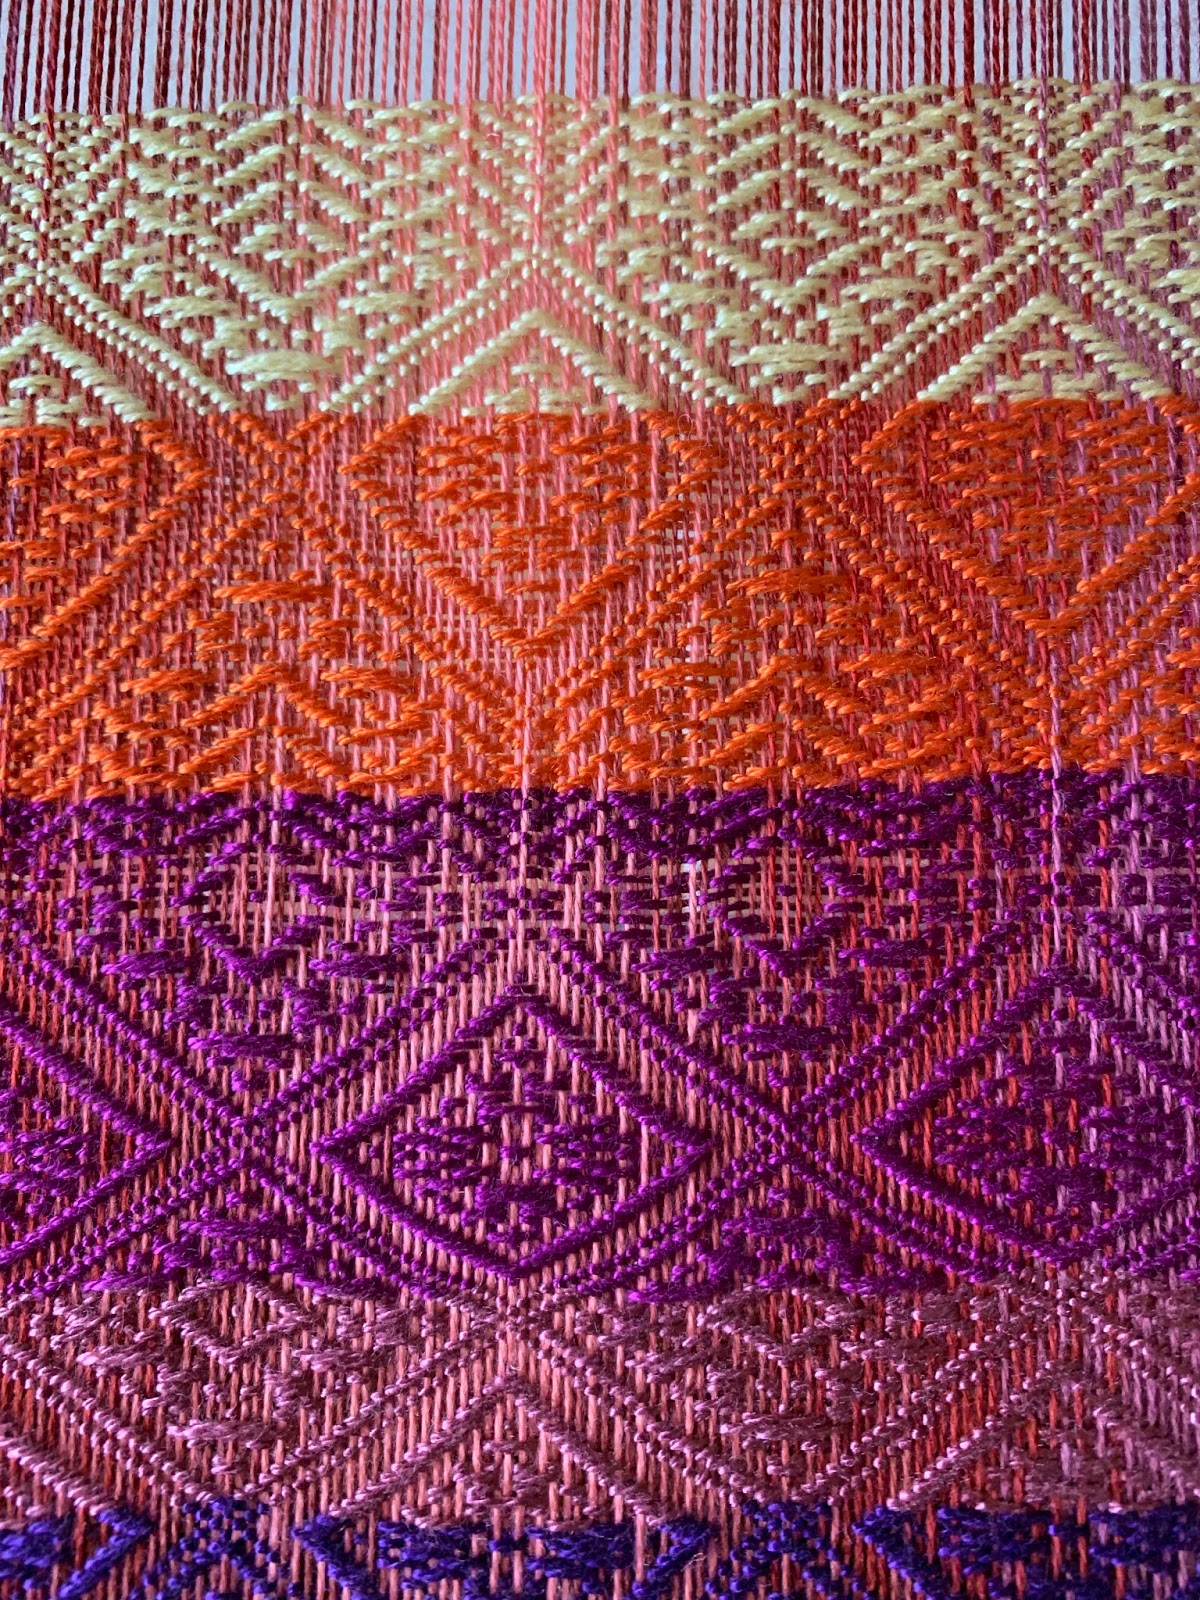
I am currently working on a Double Weave project.
I have done several DW projects in the past. One was a piano keyboard and several Double Wide items. Studying Double Weave is on my list this year and this is my first project.
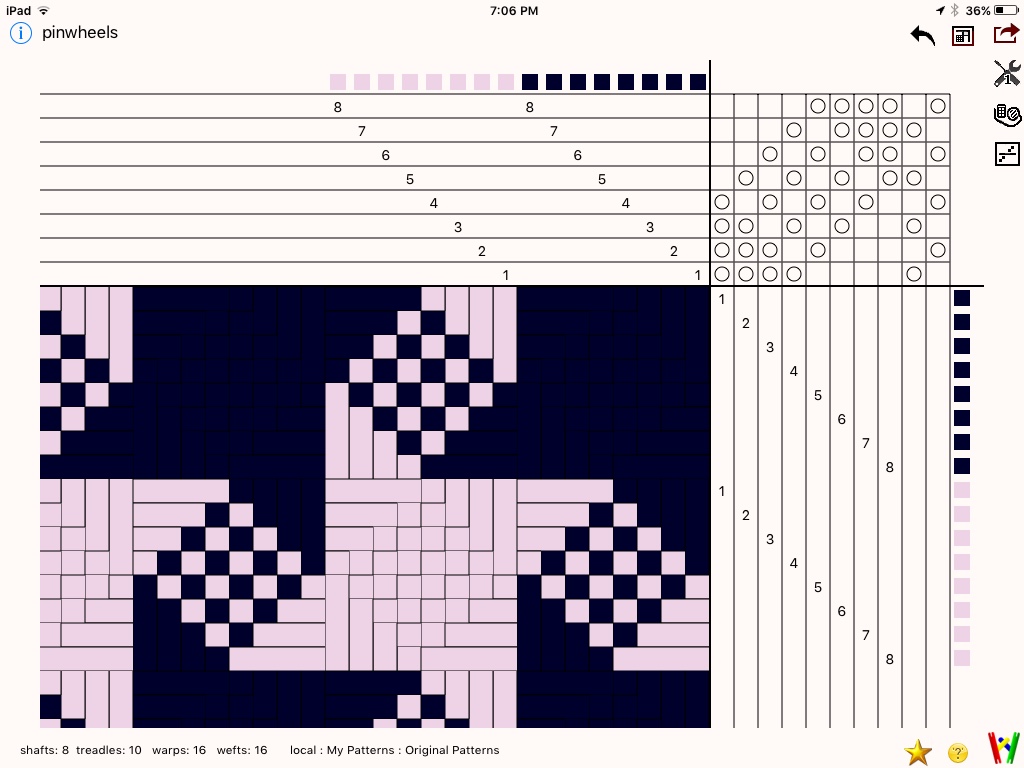
Window panes is one of my favorite drafts. I love how the colored window panes are surrounded by the black frames. It is also a good draft to understand how the various layers in DW exchange places to create the design.
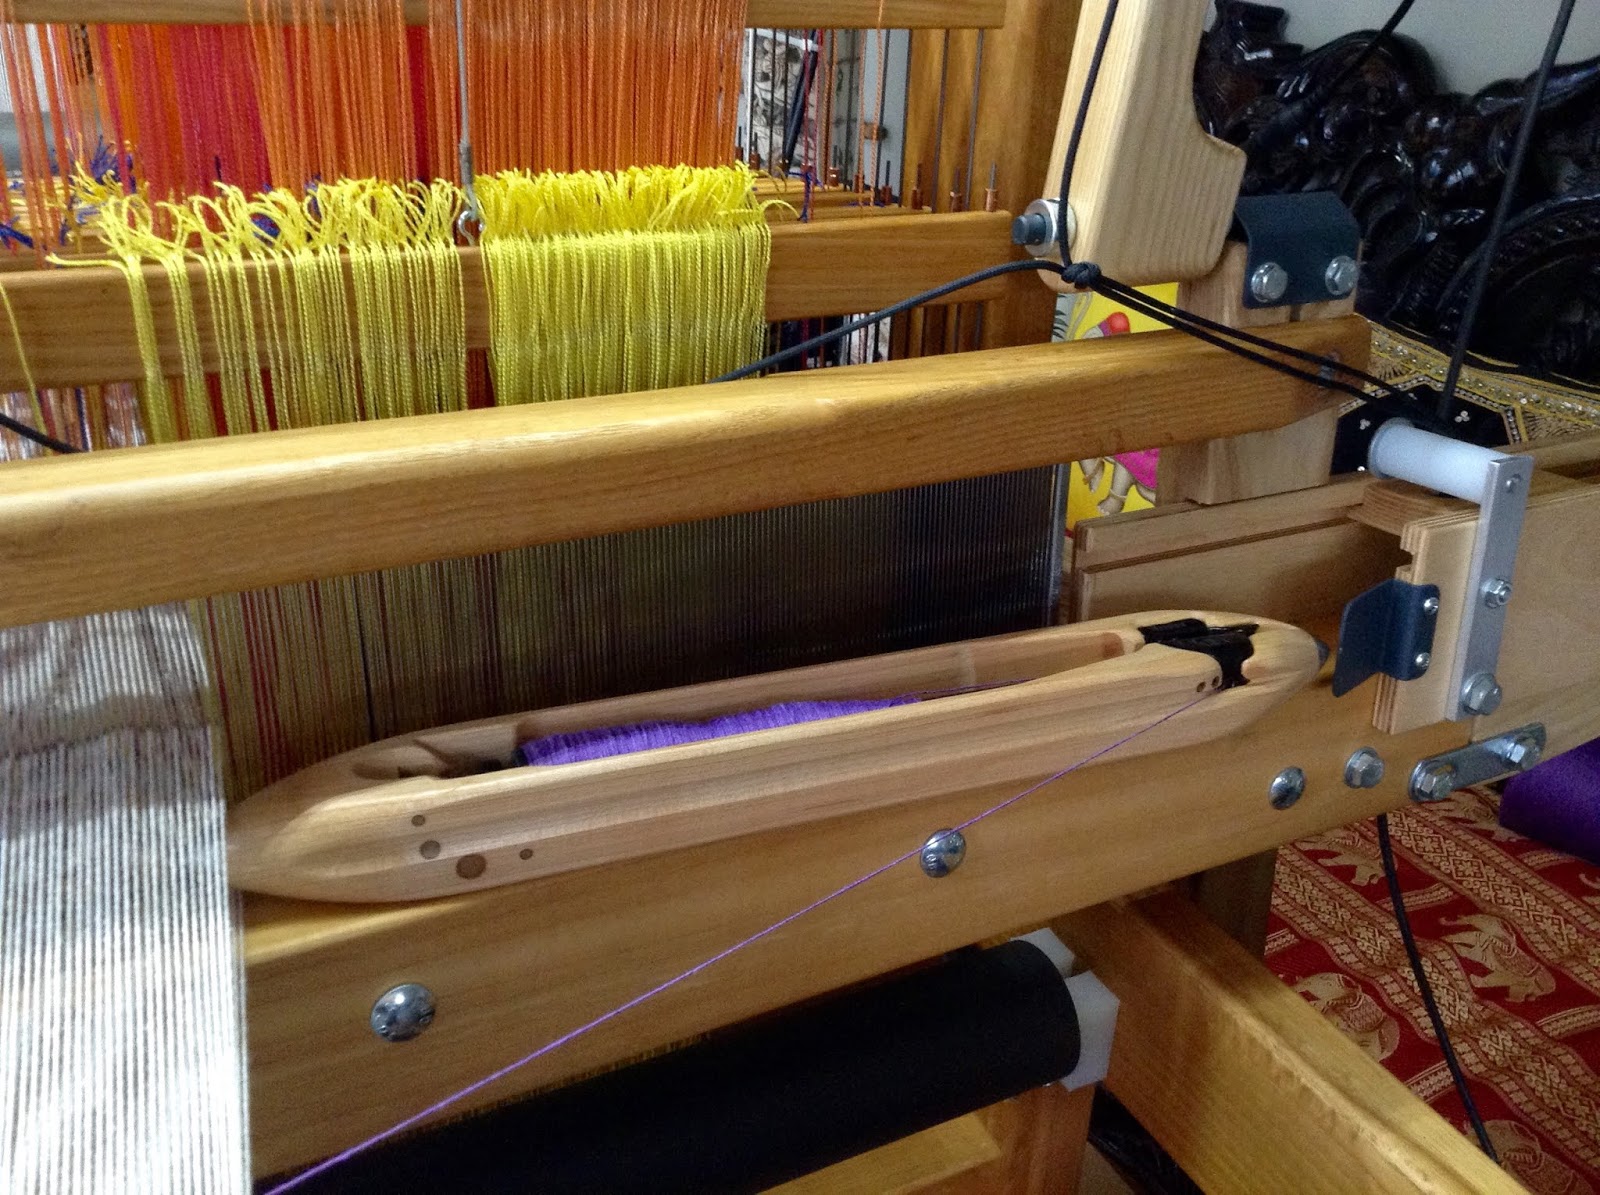
To make things more interesting, I created a gradient using two similar colors within the windows. Doing this requires using 3 shuttles, one for the black, and one for each color. Shuffling the shuttles gets a little difficult and slows the weaving down. I am enjoying the pace of this weave although I would not want to do it all the time.
To change the design it is easy to weave the windows square or elongated and changing the colors is fun.
I am weaving 2 scarves with this warp on my AVL Loom. The warp and weft are both Tencel and I chose a sett of 15 EPI on each layer, or 30EPI. Using a 10 dent reed I threaded 3 ends per dent. I will need to get the scarves off the loom and wet finish them to determine if the sett is open enough to create a nice drape in the scarves. Since the fabric is doubled I want the sett to be open enough that it is not too thick and stiff.
To learn Double Weave I have Jennifer Moore's Video and Book. A new and revised edition of her book has just become available. Here is a link to it in Amazon: Jennifer Moore Double Weave
I have not seen the new book but the original is a great source to learn DW. If you put a warp on your loom and follow along you easily learn many ways to use DW.
Tuesday, January 15, 2019
Complex Weaver's Study Groups
Last year I joined Complex Weavers Guild. Complex Weaver Link. I joined this guild when I first started weaving and enjoyed the journal that they print and send several times a year.
My first impression was that it was beyond my weaving ability. So I did not rejoin until 2018. Actually my first impression was wrong, the problem was that I did not join any of the study groups and did not take advantage of the library.
Library: Last year I read many books that I would never have had access to. It is easy to get the books. All I needed to do was look at their library on line and email the author and title of the books I wanted to their Librarian. She quickly pulls the books, calculates the postage and emails the options. Once you decide how to send the package she mails it to you. The books are on loan for 1 month and if you need longer just email the librarian and as long as no one is waiting for the books another month extension is given. Payment for the shipping is sent either by check when the books are returned or by PayPal.
The best thing is the sample books created by some of the study groups. They are a collection of samples woven by the members, including the draft and notes. Some of the weavings are spectacular. There is nothing like seeing and feeling the fabrics. It is a great way to see fibers used that you have never woven with.
Study Groups: I started with one study group last year. Designing Fabric, this group does not exchange woven samples. It chooses a study theme for the year and each member submits an article once during the year. We just upload the article to the internet and have the opportunity to discuss it with the other members.
For 2019 I joined 2 other groups, 24 More or Less and Double Weave. I tried to get into the Sixteens group, but they were at their maximum enrollment.
24 More or Less is a group for weaving with at least 17 shafts or more. All one needs to do is weave a draft using 17 shafts or more, any structure is allowed. The samples are typically about 6"x6" to 8"x8" and you need to weave 31 samples. ( one for each member and one for the library). These were due to be sent to the leader of the group by Feb. 15th. That was easy to do. Now I can start planning for next year.
Double Weave is, as the name states, a study of double weaving. This group selects a type of double weave to study each year. This year is Deflected Double Weave. 4 times a year project notes and a WIF file are due, two of these projects need to deal with Deflected DW and the other two can be projects from their lists. Only one of the projects needs to be a Deflected DW woven project.
They have lists of projects, each with a different subject. There are lots of previous projects to see and study and reference material to read.
This is a great way to force myself to concentrate on a type of weaving. Although weaving each project is not required, I find it the best way to learn so I will be doing a lot of DW this year.
More Groups: There are many more groups in Complex Weavers and it is tempting to join more but, I don't want to always have a deadline to meet. The spacing of due dates for these 3 groups works for me and the Double Weave will keep me busy.
Complex Weavers is a great guild if you participate. Every two years they have a conference with a fashion show, weaving competitions, and lots of seminars and learning opportunities. Their next conference is 2020
in Knoxville, Tn.
Tuesday, January 1, 2019
Happy New Year 2019!
These are pictures of what's on my looms January 1, 2019.

I am threading the AVL with a double weave project. You can see that I have taken the sandpaper breast beam and tension roller off the loom. Also removed, is the reed and the top that holds the reed in the beater. I then use a black stool to sit in the loom to reach the heddles easier. Another thing that makes threading easier is using the computer and Dobby to lift the shafts as I thread. My mistakes in threading have gotten so much better by doing this.
Warp:
The warp is Fuchsia/Mauve, Ming Blue/ Teal, Green, Yellow and White separated by Black.About half done, I should be weaving in a few days.
On the Harrisville Design Loom:
My Rainbow scarfs are on the HD 8 shaft loom. I am inspired to finish this warp because I need the 10 dent reed to use on the AVL. I have one more scarf to weave off on this warp.
I am enjoying weaving the bright colors of this warp. I have several drafts that I am using on this warp by just changing the treadling. I'll get a picture of all of them when they are off the loom.
It's a good start to the new year. I hemmed this scarf, threaded a few minutes and am now watching the Mummers Parade.
I hope you are enjoying your New Year day as well.
Friday, December 28, 2018
Another New Year
2018 is waning and 2019 is on the horizon.
I like to take the last few days of the year to clean and organize so I can get a fresh start in the new year. It is also a time to look back at my accomplishments or failures and to reassess my goals for the new year.
2018 was, overall, a good year for me. Although some negative things forced changes, the changes were for the better. One example is, our heating and air-conditioning system was getting old and was due to be replaced. When we had our annual cleaning and inspection the service man found that there were a few issues and suggested we should replace them. We knew it was only a matter of time and the time was now. In addition to replacing the heat pump and AC units we decided to change from an electric supplemental to propane. And, while we were putting in the propane, we might as well get the generator we had been discussing.
Another big change was purchasing a new wheelchair accessible van. My husband uses a wheelchair and it has been getting more difficult to transfer into our car, so the van was needed. It has been so much safer and easier with the van.
Now, on the weaving side, I got an AVL A-series 40" 24 shaft Compu Dobby loom. This was something I never seriously thought about until earlier this year. The cost was more than I would ever expect to spend on something for myself. I was so happy when my husband said to get it. I love my new loom. I am learning more and more about weaving and that makes me happy.
With so many major items this year I am hoping 2019 won't require much in the way of maintenance.
As far as my goals for 2019, I am hoping to exercise more, drink more water, spend more time weaving and working outside in my yard and gardens. I would like to spend more time enjoying the present and not worry about the future.
I think my goals are attainable so I should have a fantastic New Year.
I like to take the last few days of the year to clean and organize so I can get a fresh start in the new year. It is also a time to look back at my accomplishments or failures and to reassess my goals for the new year.
2018 was, overall, a good year for me. Although some negative things forced changes, the changes were for the better. One example is, our heating and air-conditioning system was getting old and was due to be replaced. When we had our annual cleaning and inspection the service man found that there were a few issues and suggested we should replace them. We knew it was only a matter of time and the time was now. In addition to replacing the heat pump and AC units we decided to change from an electric supplemental to propane. And, while we were putting in the propane, we might as well get the generator we had been discussing.
Another big change was purchasing a new wheelchair accessible van. My husband uses a wheelchair and it has been getting more difficult to transfer into our car, so the van was needed. It has been so much safer and easier with the van.
Now, on the weaving side, I got an AVL A-series 40" 24 shaft Compu Dobby loom. This was something I never seriously thought about until earlier this year. The cost was more than I would ever expect to spend on something for myself. I was so happy when my husband said to get it. I love my new loom. I am learning more and more about weaving and that makes me happy.
With so many major items this year I am hoping 2019 won't require much in the way of maintenance.
As far as my goals for 2019, I am hoping to exercise more, drink more water, spend more time weaving and working outside in my yard and gardens. I would like to spend more time enjoying the present and not worry about the future.
I think my goals are attainable so I should have a fantastic New Year.
Friday, December 14, 2018
Weaving a Rainbow
If you can't decide on a color, use them all!
I enjoy bright colors and this warp makes me happy. I warped my HD loom with 8 yards of 8/2 Tencel to weave several scarves. The threading is an 8 shaft straight draw so I can use several twill drafts to make each scarf slightly different.
Are you familiar with Tencel?
Tencel is one of my favorite threads with which to weave. It has a beautiful sheen, comes in many colors, and makes a soft, silky fabric with a beautiful drape.Tencel is also known as Lyocell. It is made from the pulp of wood which is chemically treated to create a slurry which is pumped through spineretts to make a continuous filament. Tencel can be used by itself or mixed with other fibers.
Lyocell is used in many fabrics we use daily. It is wrinkle resistant, soft, absorbent and makes a strong fabric that will stand up to machine washing and drying as well as dry-cleaning.
I have only woven with silk a few times. The silk I used was close to the size of 8/2 Tencel. For me, the silk and Tencel are almost identical. The cost of Tencel is so much lower than silk that I think it is a great substitute for silk.
There are a few things to keep in mind when weaving with Tencel. It is slippery, so when you tie on to the apron rod make sure your knots are tight. Also, the selvedge threads have a tendency to wear and break.
To reduce the breakage there are several things to do. First, watch your draw-in. If possible, use a temple, an end-feed shuttle and beat on an open shed then close the shed before pushing back on the beater. When you beat on an open shed the weft will ease into the warp better and not pull on the edges. Then, close the shed before moving the beater back. This will hold your last pick where it belongs while you change the shed. Since Tencel is slippery, it has a tendency to bounce back away from the fell if you don't trap it with the next shed.
When you take your fabric off the loom you will find it seems hard and has no drape. Don't despair. Once you wash it the fabric changes. The next step is to press it with a hot iron. I mean PRESS it. Hold the iron in one place and press down, move the iron to the next place and press down. Do this on both sides of the fabric then Iron the entire piece by moving the iron back and forth. The ironing sort of polishes the fabric. You only need to do this pressing to finish the weaving process. For future cleaning a light ironing is all that may be needed.
Tuesday, December 11, 2018
24 Shaft Design
What I love about my AVL Loom is the intricate designs that can be woven with 24 shafts. By using 24 shafts it enlarges the scale of the pattern woven, Technically, if the pattern is sett at 24 ends per inch and it is repeated as a point twill, the pattern should be 2 inches. Because of draw-in the design is slightly smaller than 2".
The challenge with an obviously square design is beating it so it is square. I am using 8/2 Tencel sett at 24 EPI. My natural beat is closer to 27-30 Picks Per Inch which would make the design shorter than wide. It takes some concentration to get the beat light enough to be 24 EPI.
I could sett the Tencel closer which would make beating it square easier, but that would create a stiffer fabric. Since I want this to be a scarf and have a nice drape I chose 24 EPI.
This draft is #29521 from Handweaving.net. This is a website with a collection of drafts and documents written about weaving. You may browse the site for free. When you purchase an annual subscription for $20. you can download WIF files of the drafts. There are drafts from 2 shafts up to at least 36 shafts.
Handweaving.net is a fantastic source of drafts as well as documents which include entire books like Peter Collingwood, The Techniques of Rug Weaving and many short articles on multiple subjects.
Friday, December 7, 2018
Warp Gradation: Using Fiberworks to create a gradient.
Gradation of colors in the warp can create a very interesting background for a pattern.
When using Fiberworks software select "Colors" from the band at the top of the screen then choose "Create Gradient". A box will appear giving you several selections.
- Choose the color you want to start with from the color bar then pick the color to end with.
- Select how many colors you want to blend. The more colors you choose, the more gradual the gradient will be.
- Number of threads. If you want the color to change across the entire warp choose the total number of warp threads. If you want to mirror the color, like the photo above, divide the total number of ends in half and insert that number. Example: 200 total warp ends would be 100 for half the warp.
- Click on "Add to end", this will place the color on the draft. If you selected half of the total warp the color will only fill in half of the draft.
- To finish the mirror effect click add to end again. This puts the color on the other half of the warp but it needs to be reversed to give you the mirror.
- Click "Reverse" and you should have the mirror effect across the entire warp.
The computer will give you an endless number of colors, however, you need to check how many colors of thread you have to create the gradient. You may need to decrease the number of colors in the program to make it practical for the colors you have on hand.
Just follow the threading sequence to get a nice gradation. This does take time when warping but it gives a beautiful warp at the end.
Something to consider when creating a gradient is the draft you will be using. When you take a lot of time to create a beautiful warp the draft should highlight the warp. You could choose a warp dominant draft or a draft with a simple design.

The draft I chose for this gradient is too dominant and hides the gradient. I tried several colors of weft and eventually picked yellow because I wanted to highlight the design. I now wish that I had not done the gradient for this draft; as it does not show in the finished cloth. In the future I need to decide in advance which aspect is more important and will choose a draft that is more appropriate.
I also think that the scale of this project is too small for the gradient. This is about 9 inches wide for a scarf. I think something wider would be better for the gradient.
The scarf is still beautiful but is not exactly what I envisioned for this warp.
Tuesday, December 4, 2018
Single Fly Shuttle... Stopping it from flying off.
This is my first experience with a fly shuttle.
I have a single box fly shuttle. This means that it uses only one shuttle. There are double and Quad fly boxes available so you can weave with multiple shuttles. I decided a single would be used the most.
My loom is 40" wide. I am 5ft 1inch tall and have short arms. When weaving full width on my HD 36"loom I could not throw the shuttle across easily, so I decided to get a fly shuttle for the 40" loom. Besides, I wanted to play with one.
It is important that you have the shuttle box even with the shuttle race on the beater so that the shuttle runs smoothly from the race into the box and vice versa. I am familiar with using an end feed shuttle and love them. When I switched from a boat shuttle to an end feed shuttle my broken selvedge threads stopped and the selvedge was nice and smooth. The shuttle for the fly has metal on the tips and is a little heavier than my other EF shuttles.
I was hesitant to use the fly shuttle. All I could imagine was the shuttle sailing off the loom and through the picture window near the loom. The first few pulls were too light to get the shuttle from one box to the other. With a little practice I was doing it well.
With the warp on the loom and thread in the shuttle I started again. Klunk, the shuttle fell off the right side of the loom and hit the floor. I got a small rug and put it under the loom to protect the hardwood floor and tried again. It fell a few more times, I could not figure out what I was doing wrong.
I asked on Warped Weavers on Ravelry.com and Bonnie Inyone suggested turning the shuttle around so that the Honex feeder was toward the reed. Like magic, it worked.
As I look at it now I understand why. As you throw the shuttle from the left to the right the thread catches the left selvedge. This starts to pull the right tip of the shuttle, where the Honex feed was, away from the reed. When it gets to the metal guide near the right box it hits the outside edge and causes it to fall outside the box to the floor.
When you turn the feed toward the reed it does not pull the tip of the shuttle out and it sails into the box with ease.
One more tip. Get a good paste wax and wax the shuttle race, fly box and the shuttle. It reduces the drag and makes using the shuttle easier. This is something that should be done as routine maintenance.
Using the fly shuttle gives me a very nice selvedge and is quicker than throwing the shuttle. The only disadvantage is that it does not allow for the use of a floating selvedge. When using a twill draft I will need to thread a basket weave or plain weave on a couple shafts to get a selvedge without floats along the edge.
I have a single box fly shuttle. This means that it uses only one shuttle. There are double and Quad fly boxes available so you can weave with multiple shuttles. I decided a single would be used the most.
My loom is 40" wide. I am 5ft 1inch tall and have short arms. When weaving full width on my HD 36"loom I could not throw the shuttle across easily, so I decided to get a fly shuttle for the 40" loom. Besides, I wanted to play with one.
It is important that you have the shuttle box even with the shuttle race on the beater so that the shuttle runs smoothly from the race into the box and vice versa. I am familiar with using an end feed shuttle and love them. When I switched from a boat shuttle to an end feed shuttle my broken selvedge threads stopped and the selvedge was nice and smooth. The shuttle for the fly has metal on the tips and is a little heavier than my other EF shuttles.
I was hesitant to use the fly shuttle. All I could imagine was the shuttle sailing off the loom and through the picture window near the loom. The first few pulls were too light to get the shuttle from one box to the other. With a little practice I was doing it well.
With the warp on the loom and thread in the shuttle I started again. Klunk, the shuttle fell off the right side of the loom and hit the floor. I got a small rug and put it under the loom to protect the hardwood floor and tried again. It fell a few more times, I could not figure out what I was doing wrong.
I asked on Warped Weavers on Ravelry.com and Bonnie Inyone suggested turning the shuttle around so that the Honex feeder was toward the reed. Like magic, it worked.
As I look at it now I understand why. As you throw the shuttle from the left to the right the thread catches the left selvedge. This starts to pull the right tip of the shuttle, where the Honex feed was, away from the reed. When it gets to the metal guide near the right box it hits the outside edge and causes it to fall outside the box to the floor.
When you turn the feed toward the reed it does not pull the tip of the shuttle out and it sails into the box with ease.
One more tip. Get a good paste wax and wax the shuttle race, fly box and the shuttle. It reduces the drag and makes using the shuttle easier. This is something that should be done as routine maintenance.
Using the fly shuttle gives me a very nice selvedge and is quicker than throwing the shuttle. The only disadvantage is that it does not allow for the use of a floating selvedge. When using a twill draft I will need to thread a basket weave or plain weave on a couple shafts to get a selvedge without floats along the edge.
Monday, November 26, 2018
Candy Cane Christmas Design
This design caught my attention while reading Ravelry.com Warped Weavers. It is the perfect design to weave for Christmas. There are versions for 4 shaft and 8 shaft drafts, but I enlarged the design for 16 shafts because I wanted to weave a table runner and placemats.
The basic draft is an undulating twill where the color placement creates the candy cane effect. If you play around with the color placement you can create many designs from this draft. It is easy to weave since you only use one color in the weft and it is a simple treading.
I warped the loom with 8/2 Cotton and added red Lurex to the red cotton stripe. It gives it a nice shine, but the Lurex does not shrink. This created some bumps in the finished fabric which I do not like and would not do it again.
I used several different yarns for the weft. First I used Linen for a table runner. The second runner I used 8/2 Cotton and the placemats I used 3/2 Cotton. I liked the 8/2 cotton results the best.
This is a draft that I will definitely weave again. I think I will use the 8 shaft draft to create dish towels. There is a front and back to this design. The green stripe on the front has a nicer look on the front of the draft than on the back.

Saturday, November 24, 2018
Assembling the AVL
About a week prior to shipping, AVL contacted me for the balance of the loom.
Two weeks later the shipping company contacted me to schedule delivery. The driver called about 10 minutes before arriving.
The loom and warping wheel comprised 11 large boxes, shrink-wrapped on a pallet. The driver put the pallet in my garage. I looked over the boxes, confirmed that there were 11 and looked for obvious damage to the boxes. If there was any damage it needs to be noted on the driver's documents and pictures should be taken to document it. The driver can not wait for you to open the boxes and check for damage, but if you see anything wrong with a box it should be noted.
The first thing I did was cut off the shrink-wrap and start to unpack the boxes. Each box was numbered and what was in them was notated on the box. As I started opening the boxes I could see that they were packed very well. There was a packing list in each box and most items were numbered or identified.
I kept each box's contents together and marked off each item on the packing list. This helped with assembly later.
My sister came over to help me put the loom together. Two people are needed to get the main structure together. We worked about 6 hours that day, less lunch and moving my old loom upstairs.
The loom comes with a binder with assembly instructions. They go step by step and explain things well. There are plenty of pictures, although I wish there were a few more photos showing the entire loom rather that just pictures of the part you are working on. It was easy to put together.
As we put together the loom I kept looking at all the parts, most looked new. The only parts I could tell were used were the main structure of the loom. The wooden structural parts. Other than that everything was new. The beams, aprons, cords, reed, even most of the Texslov heddles. I was really happy with the loom.
It took two more days to get the loom assembled. Putting the heddles on the bars is time consuming. Assembling the beater, putting on the auto advance etc. all takes time.
If anyone asks me about purchasing a pre-owned loom from AVL I would say, without hesitation, definitely do it. I don't know if my experience is normal, but I think AVL does everything to make the loom as problem free as possible. Plus, they are a phone call or email away if you have problems or questions.
Two weeks later the shipping company contacted me to schedule delivery. The driver called about 10 minutes before arriving.
The loom and warping wheel comprised 11 large boxes, shrink-wrapped on a pallet. The driver put the pallet in my garage. I looked over the boxes, confirmed that there were 11 and looked for obvious damage to the boxes. If there was any damage it needs to be noted on the driver's documents and pictures should be taken to document it. The driver can not wait for you to open the boxes and check for damage, but if you see anything wrong with a box it should be noted.
The first thing I did was cut off the shrink-wrap and start to unpack the boxes. Each box was numbered and what was in them was notated on the box. As I started opening the boxes I could see that they were packed very well. There was a packing list in each box and most items were numbered or identified.
I kept each box's contents together and marked off each item on the packing list. This helped with assembly later.
My sister came over to help me put the loom together. Two people are needed to get the main structure together. We worked about 6 hours that day, less lunch and moving my old loom upstairs.
The loom comes with a binder with assembly instructions. They go step by step and explain things well. There are plenty of pictures, although I wish there were a few more photos showing the entire loom rather that just pictures of the part you are working on. It was easy to put together.
As we put together the loom I kept looking at all the parts, most looked new. The only parts I could tell were used were the main structure of the loom. The wooden structural parts. Other than that everything was new. The beams, aprons, cords, reed, even most of the Texslov heddles. I was really happy with the loom.
It took two more days to get the loom assembled. Putting the heddles on the bars is time consuming. Assembling the beater, putting on the auto advance etc. all takes time.
If anyone asks me about purchasing a pre-owned loom from AVL I would say, without hesitation, definitely do it. I don't know if my experience is normal, but I think AVL does everything to make the loom as problem free as possible. Plus, they are a phone call or email away if you have problems or questions.
Saturday, September 22, 2018
AVL A-Series 40" 24 Shaft CD 4.5 Loom, New to me.
Earlier this year I found an AVL 60" Compu Dobby loom for sale by an individual. I was not the first to contact the seller and she had someone interested, who eventually purchased the loom.
I was happy, and still am, with my HD 8 shaft 36" loom. However, I was always curious about Compu Dobby looms and wanted something wider. The loom above was a great deal for everything included, but the cost is still high, about the price of a used car.
The cost was a major deciding factor for me. I feel guilty spending that kind of money on myself, so I spoke to my husband and he said if I really wanted one, get it. I continued looking for a used loom offered by an individual, but there were none that would work for me.
AVL is located in Chico, CA. I like that they are very innovative and continue to create looms with better computers and enhanced features. I still could not bring myself to order a new loom because of the cost, but AVL buys back looms from their customers. They go over the loom completely and replace worn parts.
AVL did not have any pre-owned looms that fit my requirements so I kept watching their website. One day an A-series 40" 24 shaft CD III became available. They offered an upgrade to the newest CD4.5. So I jumped on it.
I emailed Bob Kruger at AVL with a few questions and he responded the next day. I confirmed my order with him within a few days and made a deposit of 50%. I decided to get a warping wheel, add a single box fly shuttle to the loom, changed one of the plain beams for a 1 yd sectional beam and converted the beater to an overhead beater.
Now the hardest part of ordering the loom ensued. I had to wait 12 weeks for delivery.
During that time I downloaded the assembly manual and tried to learn as much as possible about multi-shaft weaving and creating drafts for 24 shafts. I also started working with Fiberworks weaving software. I downloaded the free copy to make sure it was what I wanted to purchase when I got the loom.
The time went quickly, and before I knew it the loom had arrived.
I was happy, and still am, with my HD 8 shaft 36" loom. However, I was always curious about Compu Dobby looms and wanted something wider. The loom above was a great deal for everything included, but the cost is still high, about the price of a used car.
The cost was a major deciding factor for me. I feel guilty spending that kind of money on myself, so I spoke to my husband and he said if I really wanted one, get it. I continued looking for a used loom offered by an individual, but there were none that would work for me.
AVL is located in Chico, CA. I like that they are very innovative and continue to create looms with better computers and enhanced features. I still could not bring myself to order a new loom because of the cost, but AVL buys back looms from their customers. They go over the loom completely and replace worn parts.
AVL did not have any pre-owned looms that fit my requirements so I kept watching their website. One day an A-series 40" 24 shaft CD III became available. They offered an upgrade to the newest CD4.5. So I jumped on it.
I emailed Bob Kruger at AVL with a few questions and he responded the next day. I confirmed my order with him within a few days and made a deposit of 50%. I decided to get a warping wheel, add a single box fly shuttle to the loom, changed one of the plain beams for a 1 yd sectional beam and converted the beater to an overhead beater.
Now the hardest part of ordering the loom ensued. I had to wait 12 weeks for delivery.
During that time I downloaded the assembly manual and tried to learn as much as possible about multi-shaft weaving and creating drafts for 24 shafts. I also started working with Fiberworks weaving software. I downloaded the free copy to make sure it was what I wanted to purchase when I got the loom.
The time went quickly, and before I knew it the loom had arrived.
Monday, September 17, 2018
Walking your Treadles
This is something I did not know about when I first started weaving. I don't remember where I learned about it, but it has made my weaving much easier.
When I first started to weave, I would use a draft like the one here. I tied my loom up exactly the way the draft was written. To treadle this draft I would use my left foot on treadle 1. Move it to the right to treadle 2, then 3 then 4. When I reached the center I switched to my right foot and continued in the same fashion, moving my foot one to the right from 5-8.
Doing it this way works, but I find it puts my body off balance. When I lift my left foot move it, my right foot is hovering in the air. To correct this I change the tie-up on the loom to allow my left foot to depress the first treadle. Then, my right foot depresses the next treadle. Then back to the left, then the right. In a walking pattern.
When my left foot has a treadle depressed, my right foot hovers above the next treadle to depress. This allows one of my feet to be on the ground (as it pushes down on the treadle) at all times. This keeps my body balanced and my posture straight. It also makes weaving faster because my foot is ready to depress the next treadle.
So... How do you set up the loom to do this?
First you need to look at your draft. It works best with a straight draw or point draw treadling. If your draft jumps around on the treadles it may not work as well.I like to set up the two outer treadles to weave Plain Weave or Tabby. I usually leave them tied-up like this unless I need to change it for some reason.
Remember, your treadles don't need to be named 1-10 from left to right. You can number the treadle anything you want. Often the Tabby treadles are called A & B. You can put them anywhere you want.
If you are weaving all Plain Weave, choose two treadles that are most comfortable for you.
I would choose 3 and 6 if they were the only treadles I was using because that is where my feet fall naturally. When I have a draft that does not use Plain Weave I put them on 1 and 10 so I have use of them to weave a hem if I want to, but those are the farthest treadles and more difficult to reach for pattern.
With 1 & 10 used for the Plain Weave, I now have 8 treadles to use for the pattern. I try to keep my left foot to the left of the center of the treadles (1-5) and my right foot to the right.
Using Blue Painter's tape, I number my treadles so I can look down to make sure I am on the correct treadle.
Starting with 1 and 10 for Plain Weave, mark them A and B.
Now the treadles from the left are labeled A, 1, 3, 5, 7 and the right are 2, 4, 6, 8, B
Tying-up the Treadles:
Time to get under the loom. Looking at this draft, we need to tie treadle 1 with shafts 1,2,3,4.
Now move to the treadle marked 2 with the blue tape. It should be the first treadle to the right of center. It gets tied to lift shafts 1,2,3,5.
Treadle 3 is on the left next to 1. Tie-up 1,2,4,6.
Treadle 4 is on the right next to 2. Tie-up 1,3,5,7 Notice: this is the same as Plain Weave A, but I would tie treadle 4 with this because it will make treading easier when doing the pattern.
Treadle 5. Tie-up 2,4,6,8 This is the same as treadle B, but tie it up here.
Treadle 6. Tie-up 3,5,7,8
Treadle 7. Tie-up 4,6,7,8
Treadle 8. Tie-up 5,6,7,8
Weaving the Draft:
This is an easy draft to weave because it goes 1,2,3,4,5,6,7,8 then starts over again. This is a Color n Weave draft that requires changing the color of the weft after every set of 1-8.
If it was a little more complicated I would write the sequence on a piece of paper and attach it to the loom so I could keep track of the treadling.
Sitting at the loom, start with your left foot on treadle 1, throw the shuttle, beat. Next, your right foot treadles 2. As soon as you press down on treadle 2 move your left foot above treadle 3. As soon as you throw your shuttle for treadle 2 and beat you are ready to press down on 3.
Using Software to Shift the Shafts:
If you have full feature weaving software on your computer you, most likely, have the capability to move the shafts automatically to decide what configuration would work best for you. I say "full feature" software because the App named iWeaveIt that you can use on your iPad or iPhone does not have this feature. You need to get WeaveIt Pro or Fiberworks for your computer. There may be other programs for this, but these are the ones I am familiar with.
Conclusion:
Some people love walking their treadles, some prefer to use the draft as written, it is up to you. Many people don't even know it exists. I hope you try it and decide for yourself. As I mentioned earlier, it does not work for every draft.Looms...Backstrap to Computer Dobby
I love my Harrisville 36" 8 shaft loom.
It amazes me that over the history of looms they are still basically the same.
A wood frame that holds a warp beam and cloth beam to keep the warp taught. Shafts and heddles to choose and lift the warp threads and a beater with a reed. The only other tool needed is a shuttle to place the weft.
In my travels through Peru, Cambodia and Thailand, georgeous fabrics are still woven on backstrap looms. The women using them anchor one end to a tree or anything available, sit on the ground and weave most of the day. The loom is folded around itself and is light weight and portable.
What else does one need? Well...it turns out I and many other weavers need (want) much more.
More shafts, more sizes of reeds, sectional beams, Dobbys, Computer Dobbys, wireless connections...
My question is, At what point does technology overshadow the art of weaving?
Did moving from a backstrap loom to a floor loom make the woven fabric less handmade?
Did moving from 2 shafts to 4, 8, 16, 24 shafts change it also?
Does using a Computer Dobby take the personal touch out of creating a fabric?
These were all questions I asked myself when considering getting a 24 shaft Computer Dobby loom.
My answer is that the addition of these tools allows for greater creativity, not the loss of the art of weaving.
What do you think?
It amazes me that over the history of looms they are still basically the same.
A wood frame that holds a warp beam and cloth beam to keep the warp taught. Shafts and heddles to choose and lift the warp threads and a beater with a reed. The only other tool needed is a shuttle to place the weft.
In my travels through Peru, Cambodia and Thailand, georgeous fabrics are still woven on backstrap looms. The women using them anchor one end to a tree or anything available, sit on the ground and weave most of the day. The loom is folded around itself and is light weight and portable.
What else does one need? Well...it turns out I and many other weavers need (want) much more.
More shafts, more sizes of reeds, sectional beams, Dobbys, Computer Dobbys, wireless connections...
My question is, At what point does technology overshadow the art of weaving?
Did moving from a backstrap loom to a floor loom make the woven fabric less handmade?
Did moving from 2 shafts to 4, 8, 16, 24 shafts change it also?
Does using a Computer Dobby take the personal touch out of creating a fabric?
These were all questions I asked myself when considering getting a 24 shaft Computer Dobby loom.
My answer is that the addition of these tools allows for greater creativity, not the loss of the art of weaving.
What do you think?
Subscribe to:
Posts (Atom)